Building your own Bitmaps and Animation for the 128x64 Graphics Kit
By Tom Kibalo
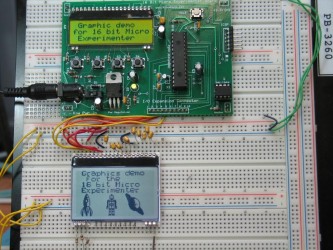
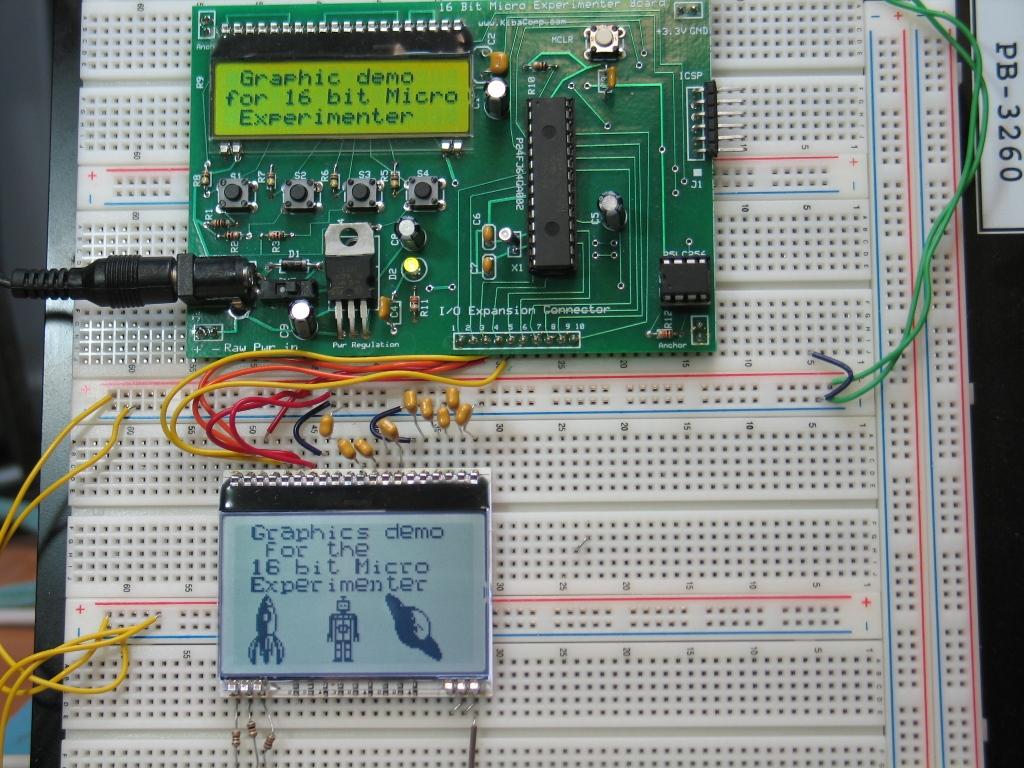
In the April article we described a ‘C’ Code based graphics software library for the graphics kit. It included functions to draw lines, bars, circles, triangles, rectangles, plot data, output text, and display bitmaps. The article also included hardware hook up diagrams for connecting the kit to the Experimenter.
A New Bitmap and Animation Capability! One of the neat features of the library is the ability to show really cool bitmaps on the display. The original demo included eighteen pre-configured bitmaps (these were focused on a SCI-FI genre with rockets, planets, robots, and satellites). However, these bit maps are fixed in content and size.
Here, we'll show you how to take any .bmp files and generate your own bitmaps to display on the graphics kit, plus show how to produce simple animation with these same basic techniques!
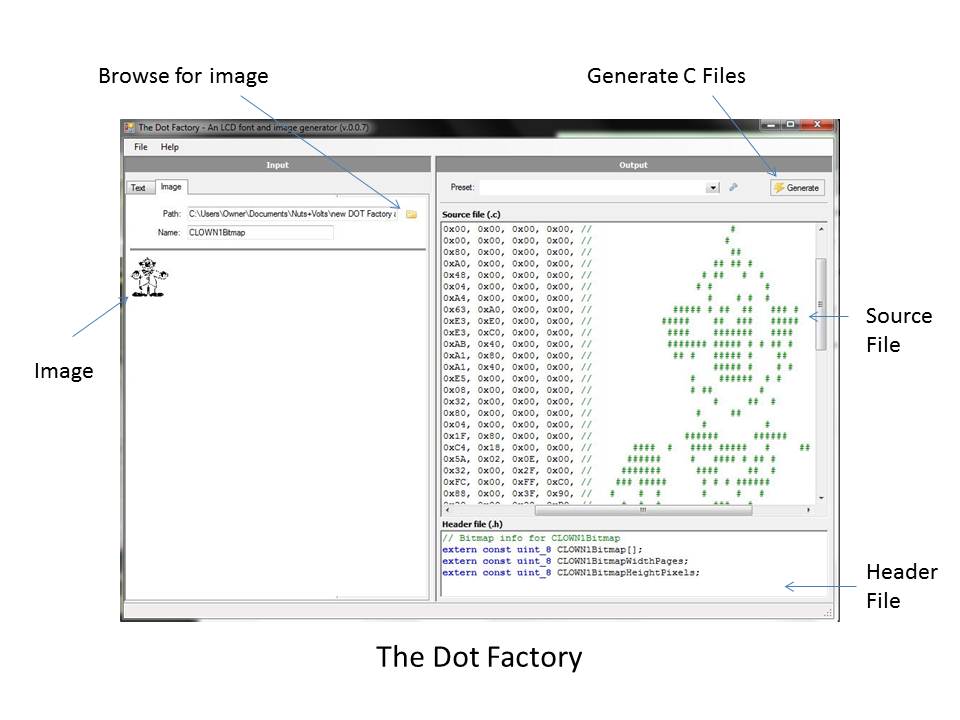
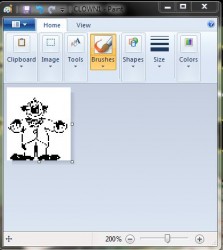
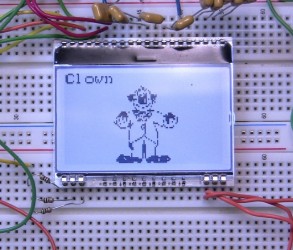
For our example we'll use the CLOWN1.bmp, located in the one of the supplied folders named “small clowns”. You can examine CLOWN1 using Windows PAINT or draw your own (see figure 2). It's important to note that these images are monochrome and are no larger than 128x64 pixels (remember the Graphics Display supports only monochrome and is 128x64 in size). Demo code is also provided as Microchip MPLAB Project Files for all examples.
The first thing to do is to convert CLOWN1.bmp into something that the graphics library can work with –‘C’ files. We have just the tool – it's available open source at [url=http://www.pavius.net/downloads/tools/53-the-dot-factory]http://www.pavius.net/downloads/tools/53-the-dot-factory[/url]
It's called Dot factory and is a free tool used to convert font and .bmp bitmaps for use with ‘C’ code applications that use graphic displays. We will focus here only on its’ bitmap features.
Using Dot Factory Let’s go through the steps of installing and using the Dot Factory tool.
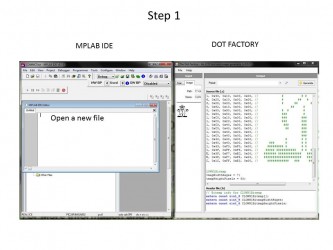
1. First download and install Dot Factory on your machine. 2. Using the Dot Factory select image tab, browse to and open the CLOWN1.bmp image (all .bmp are supplied along with the demo code). 3. Press the generate button and your desktop should look like figure 3. On the left pane is the original image, on the right is a split pane for two ‘C’ files, a source file ‘.C’ for the image context and a header file ‘.H’ with three defined variables : a pointer to image and the image size and height. We will be using both files. 4. The final trick is to copy these files into your Microchip MPLAB 16 Bit Experimenter Project. Everything is already done for you in the supplied demo programs, and examining the code in these programs is a good starting point, but we will still go step by step to show you how to do this for your own designs.

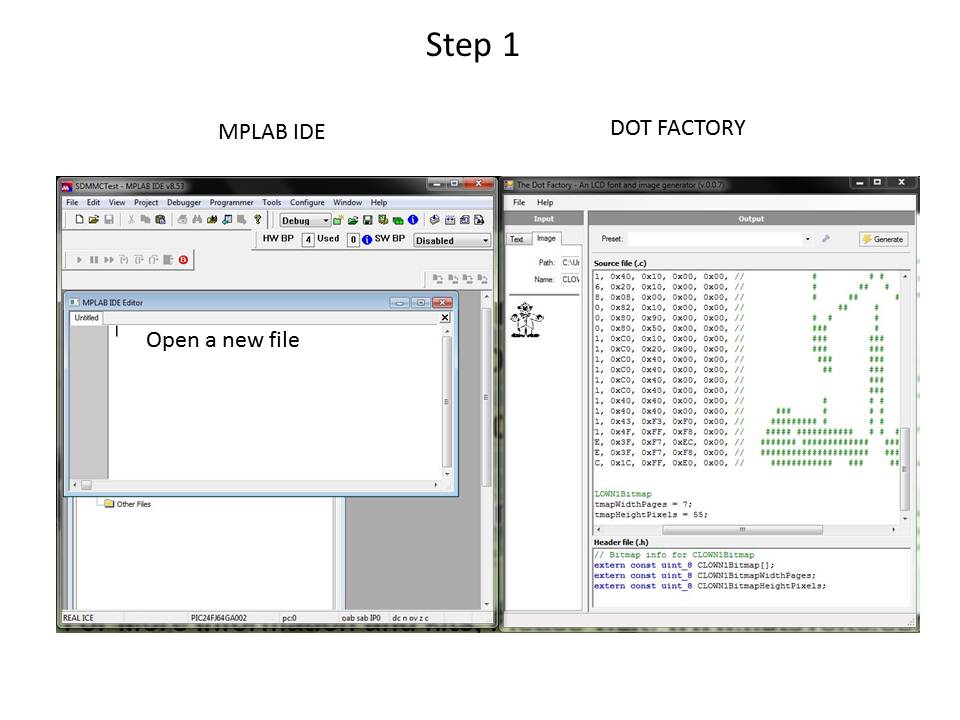
Bringing Dot Factory Files Into MPLAB Project The conversion and integration of the Dot Factory bit map generated C files as C files into your MPLAB project is straightforward and covered here in a series of steps and supplemented with figures.
STEP 1 – open an empty file within your MPLAB project
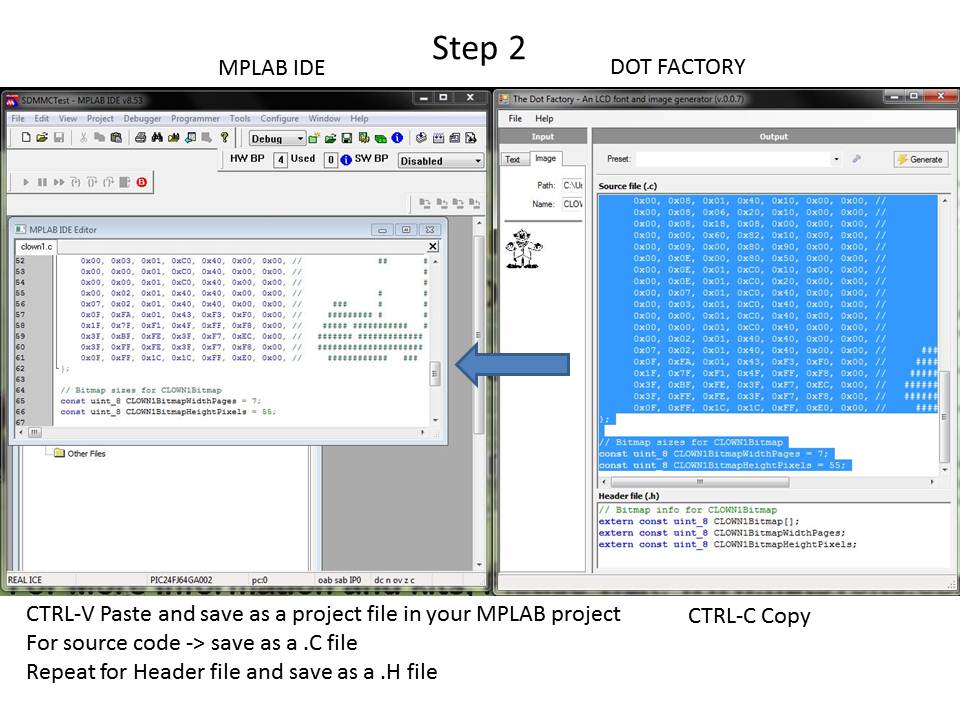
STEP 2 a. Transfer the source code from DOT Factory to MPLAB by selecting the source code in DOT Factory, performing a copy using CNTRL-C, and then pasting it into the MPLAB open file. b. Save this file as a .C file using the name of the bitmap. c. Finally integrate this as a file in your project using project View in MPLAB and “add” option. d. Repeat this process for the header file and in this case making a .H file

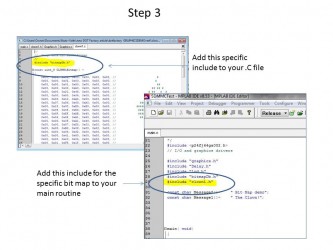
STEP 3 – Final part of process a. add #include “bitmapDb.h” to the bitmap ‘ .C’ file to allow Dot Factory unique variable types to be complied b. be sure to also add #include “bitmapDb.h” to your main.c c. add a reference to the bitmap ‘.H’ file in your main.c
Using The Graphics Library's New Bitmap Function Once all files are converted and integrated in MPLAB we use an updated function within the graphics library to draw the bit map to the display. It looks like this:
• drawbitmap ( pointer to Bitmap, x ,y, Width, Height) – the pointer points to the bit map content, x and y represent the placement of the bit map on the display, and width and height correspond to size of bitmap. For our specific clown application the bitmap function looks like the following. You can examine it for yourself in main.c of the demo code. • drawbitmap ( (unsigned char*) &CLOWN1Bitmap, 40,0,CLOWN1BitmapWidthPages, CLOWN1BitmapHeightPixels);
The Final Result A bit map is drawn. All the code is contained in Custom Bitmap Demo project.
Animation Example Ok, let’s use the same techniques and add more clowns (bitmaps). As each clown is presented on the display in turn (with some delay between each) ---the appearance is animation! Check it out, the clown is juggling!  The code is contained in Animation demo. Enjoy!
Animate_Demo.zip Custom_Bit_Map_DEMO.zip small_clowns.zip More 16-bit Micro Experimenter Articles
The 16-Bit MicroExperimenter kit is available now and can be purchased from the Nuts & Volts webstore.
Purchase Kit Now!
Comments